some new and some old buttons from my grandma


old buttons!

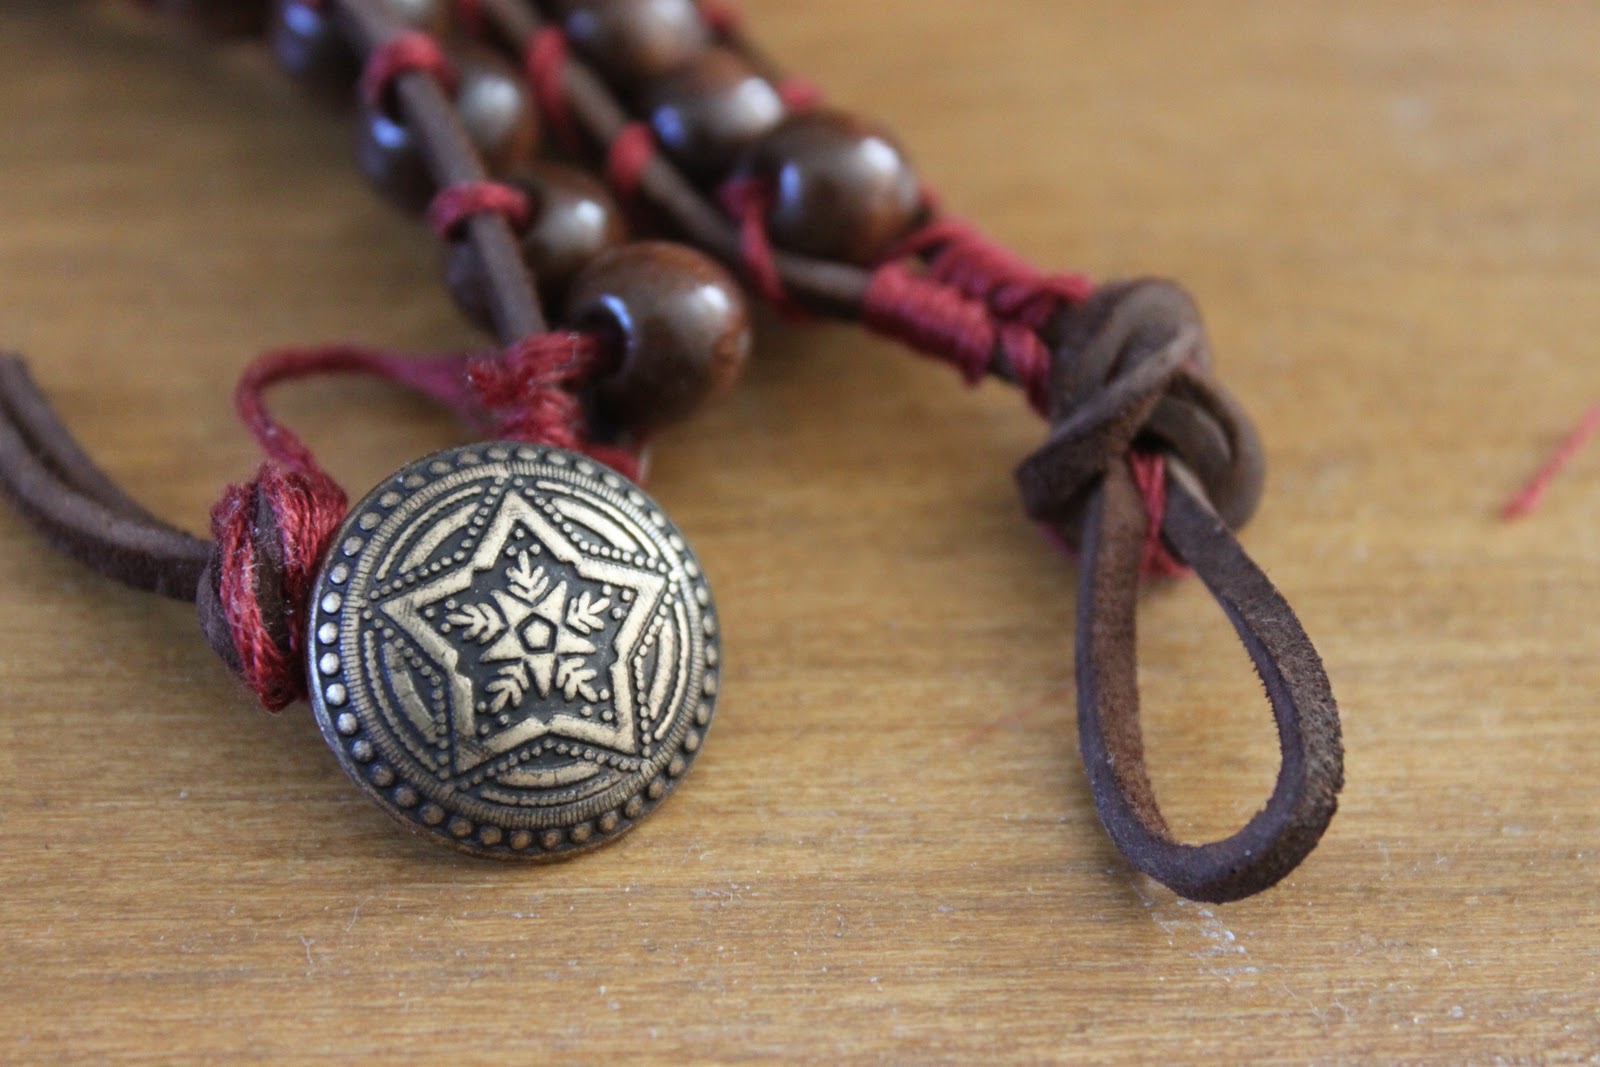
my favorite bracelet


Sorry for the lack of posts! I think I'm back now...Anyways, here is another tutorial on how to make your own bracelet! I found it really difficult for me to take photos while making the bracelets, so sorry! However, there are many tutorials for this type of bracelet out there!
You don't really need exact measurements, just measure according to your size
I got my supplies here: www.ornamentea.com (specifics below)
Supplies**:
1. Greek leather cord (i think i got brown) : http://www.ornamentea.com/StringingMaterial.htm
2. waxed linen cord (scroll down!!!) : http://www.ornamentea.com/StringingMaterial.htm
3. beaded chain : http://store.ornamentea.com/merchant2/merchant.mvc?Screen=PROD&Store_Code=bedizen&Product_Code=BCM01
4. a button! (you could use a normal button, but i didn't. i used a button that has no holes in the front or back, but instead has an attached loop behind it (almost like a miniature ring hole for a super duper tiny finger...ill post a picture later) i've seen people use bolts
Instructions:
1. First of all, your Greek leather cord is going to be folded in half, so cut more than one loop around your wrist size***. We are going to need to create a loop at the top for your button to fit through, make it tight enough so the button can't slip out. Also we're going to tie a knot at the end so you're going to need a substantial amount to tie the knot otherwise you might have some difficulty. To create the loop, simpy fold the leather cord in half and the area at the bend is going to the loop (look at last picture for an idea).
2. Now the rest of the cord should just be put together side by side.
3. Take a LONG string of wax linen cord and begin wrapping it at the base of the loop. IF IT MAKES IT EASIER - tie a knot after the loop to keep it in place. Wrap the waxed linen cords about 6-7 times.
4. Lay a string of beaded cord (should be the size of your wrist***, or a little smaller because the wrapped linen cord takes up space) onto the the rest of the leather cord.
5. begin wrapping the rest of the waxed cord around the beaded chain. (there are grooves, its simple but handling it is a bit hard. especially wrapping around the first bead)
6. at the end of the chain, just wrap the cord around several times to secure it.
7. BEFORE you tie a knot, add your button or whatever you decide to use as a clasp, then tie the not.
8. DONE. PRESTO. VOILA.
here are some other links to the same tutorial, if you have trouble
http://honestlywtf.com/diy/diy-wrap-bracelet/ - i really like this tutorial and their ideas! check out the rest of the DIYs
**if you get one greek leather cord and one beaded chain package, the leather cord makes about 5 single wrap bracelet. the beaded chain makes 6 single wrapped bracelets.
***you can make this a wrap bracelet by doubling everything!
****NOTE: pics canon t1i, no editing...sorry about the last pic, took it last minute hours later